.Net Developers must know one ORM library, which is EntityFramework core. It is currently maintained by Microsoft. It is the most stable and mature ORM library in .net community. It supports database migration and model mapping as the same time. Although this is the most popular ORM in .net community, it does not mean entity framework core is the best. In terms of speed performance and size, another ORM "Dapper" is better. Therefore, for some lightweight project, many developers may like to use dapper instead of entity framework core. However, dapper does not support database migration. That leads developers, especially who rely on migration to maintain the database schema, avoid to use it.
Actually, there is other migration library in .net community, which can manage the database schema through database migration as well. It is Fluent migrator. It is created earlier than entity framework. Developer can use it with dapper at the same time to produce the same effect of entity framework core. In this article, I would show you how to use this library to implement basic database migration. The article is structured as follow:
- What is database migration
- Demo program description
- Implementation
- Wrap-up
What is database migration?
Database migration is a structure way to alter the database schema without interact with SQL scripts, which includes create, update, insert or alter statement. The core idea is that developers can deal with the database manipulation without using any SQL statement. Therefore, developers can implement the database schema alteration tasks even they do not have any SQL language knowledge. In addition to this, the database migration can solve the environment problems(i.e, local database, testing database, staging database and production database) by control the migration program version, because the database schema is defined through C# code, which can be checked into version control system like SVN and git.
Demo program description
In this article, I create a demonstration program to show you how to implement the database migration task through Fluent Migrator library. The database migration tasks include create table, add new column, create foreign key and primary key, rename column, insert default record and update record value. I think all the mentioned operations are enough to cover your usage practically. The demo program is a console program. It supports the database schema changing and roll back schema changes.
Implementation
I create a console program which supports to use the Fluent Migrator to alter the database schema. The database is host on SQL server. This program supports up and down migration operation, and perform the database scheme changing to specified version. In general, there are two ways to use the Fluent Migrator library to do the database migration.
The first approach that is create migration scripts only and do the migration task through cli tool (FluentMigrator.DotNet.Cli) It is called using-out-of-process executors. Before you use this approach, please make sure you have installed the FluentMigrator.DotNet.Cli tool.

Then you can use this tool to execute the following command.

Where -c is the connection string and -a is the binary execution that includes the migration script.
The second approach is create a program which includes the migration script and the migration process in one binary execution like the demo program of this article. It is called using in-process executors. The benefit of create custom migration program that is we can debug the migration logic. It is very useful when your database schema grows larger.
Preparation
First of all, you should install the Fluent Migrator library through nuget.


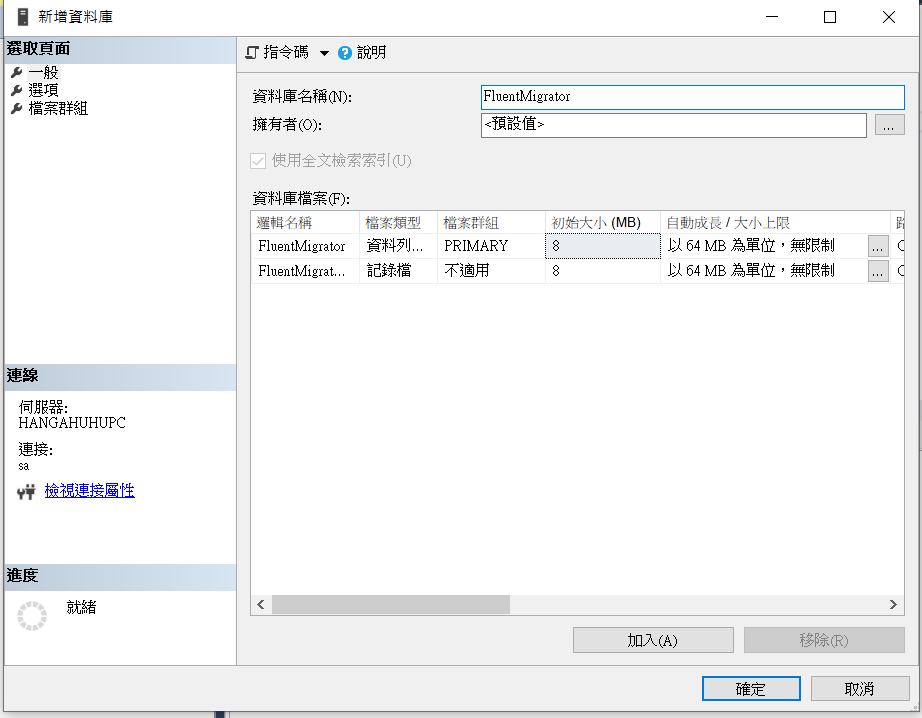
Secondly, please go to your SQL server to create your target database. Otherwise, when you try to create a table, the Fluent Migrator will raise an exception.
Program entry and database migration implementation
Now, you can concentrate on the C# program. In order to let the program supports the up and down migration command, I create a class called parser to parse the input arguments.
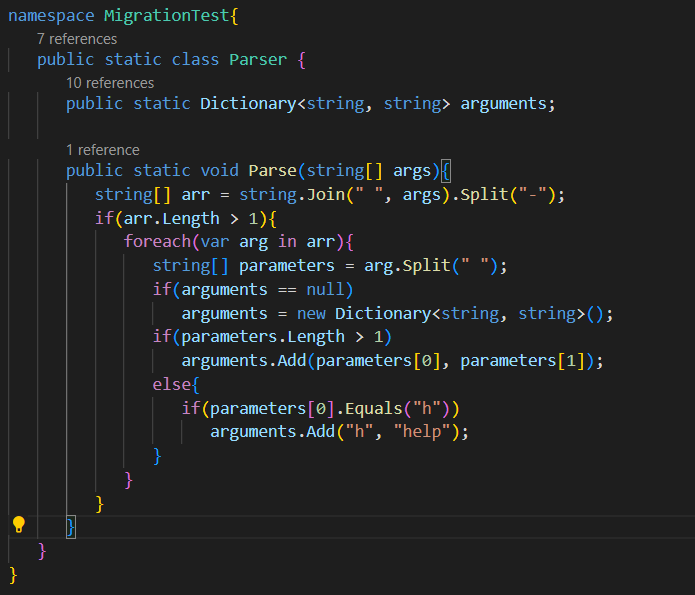
I use the space to separate arguments and the argument should start with "-" symbol in order to distinguish the argument meaning. The input format is shown as follow.

In addition, I also use the common pattern -h to display the usage guideline of this program.

Now, you have implemented the basic entry of the migration program. It's time to implement the core logic. All instructions for executing the database schema alteration are embedded in the Runner class. The runner class has a function call run, which is the main entry for others to start the migration process.
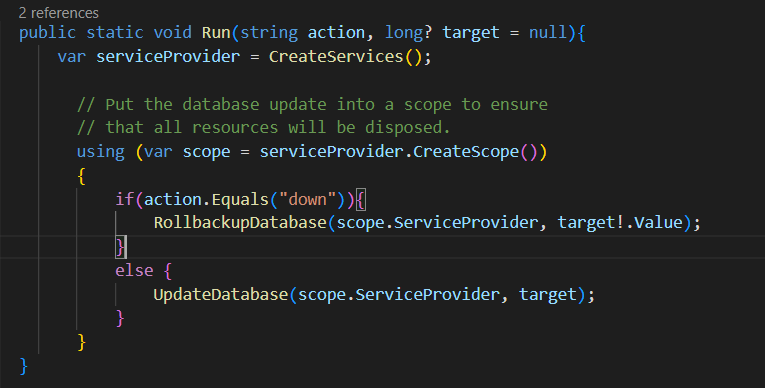
This method justify the action argument . If it is down, then the program will roll back the database to the target version. If it is up, then the program will perform the database schema updating. The following are the definitions of update schema and rollback schema function.
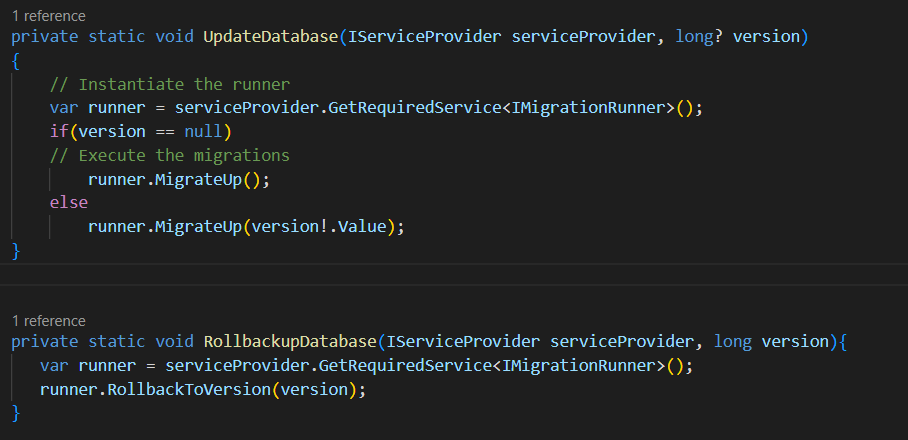
For the update instruction, if user specifies the version number, then the program will update to latest version in default. But for the rollback instruction, user must specify the database version that you want to change back.
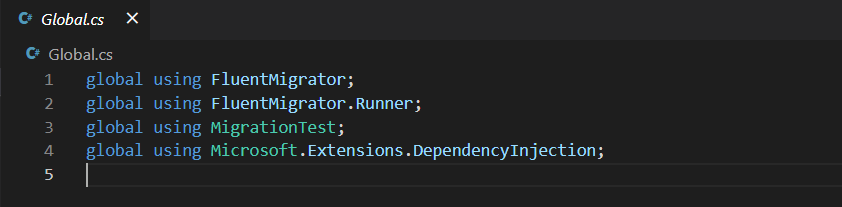
Global using namespace
Thanks to the new feature "global using directive" in C# 10, I declare the using namespace globally in one files. It reduce the duplicate codes of using namespace and keep the code clean.
Followed all the above guides, I believe you completed all the preparation steps successfully. Now, we start to focus on the database migration part.
Database migration
The migration file should be declared like the following pattern.

All the migration class must derived from Migration class of Fluent Migrator, and implement two methods. They are up and down. Furthermore, you also need to define the migration sequence number by using migration attribute. [Migration(xxx)] This number is let the program to know which migration script should be run firstly. Lower number execute first and then larger. This number also use as the target version for you to specify the database version. Therefore, the number must be unique in the same database. For the sake of simplicity, you can use 1,2,3 and etc.. as the sequence number. But in my practice, I like to use the create time to specify the migration order.
In this example, the migration order is 202205051453 It indicates that this migration file is created at 2022/05/05 14:53.
In addition, this migration file shows you the basic syntax for creating a new table by using Create.Table("xxxx") syntax. XXX is the table name. Then I use the WithColumn method to create table columns one by one through fluent pattern of C#. In fluent migrator. This kind of syntax is called fluent interface. It includes 7 types of expression sytnax. They are Create Expression, Alter Expression, Delete Expression, Execute Expression, Rename Expression , If Database Expression and Schema Exists expression. Some of them I would explain in the coming migration script.
The following is the wrap-up for creating the column with type and specify attribute.
AsInt64() : Int
AsString(): Varchar
AsDateTime: varchar
NotNullable(): declare this field must have value when inserting
PrimaryKey(): declare using this column as the primary key in table.
The down method is destructive instruction. It let the database schema backward to the previous point in time. As opposite to create table. There is a delete instruction, which is "Delete.Table("Users")" instruction in this example.
The second example CreateLogsTable produce the same effect as the first migration did. It create a Logs table.
The third example shows you how to add a new column to the existing table
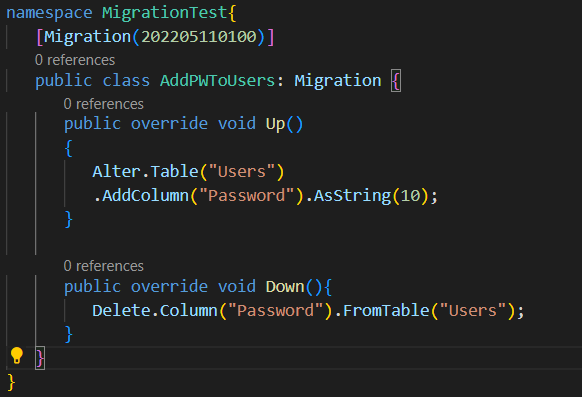
In this example, I add a new column password to the user table. As opposite, the down method would delete the password column.
The fourth example CreateLogForeignKey show you how to create the foreign key to the existing table.
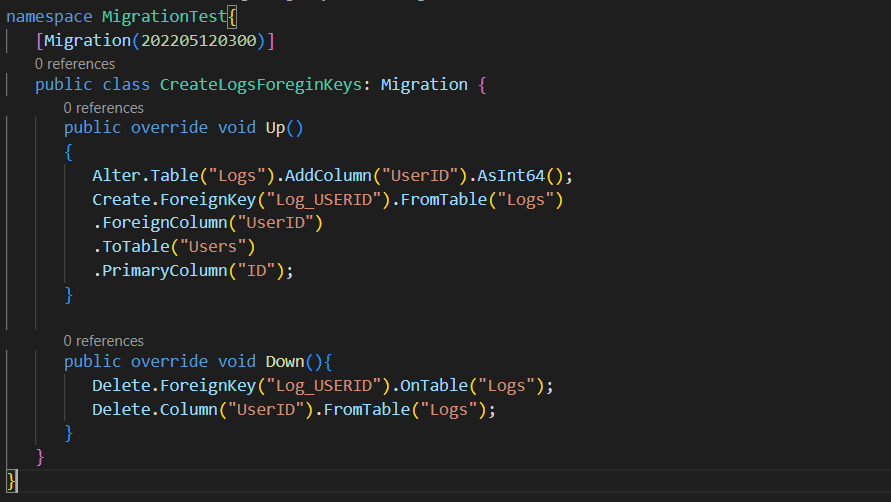
In this example, I first create a column called UserID in Logs Table. Then I use the Create.ForeignKey("XXX") expression to create a foreign key.
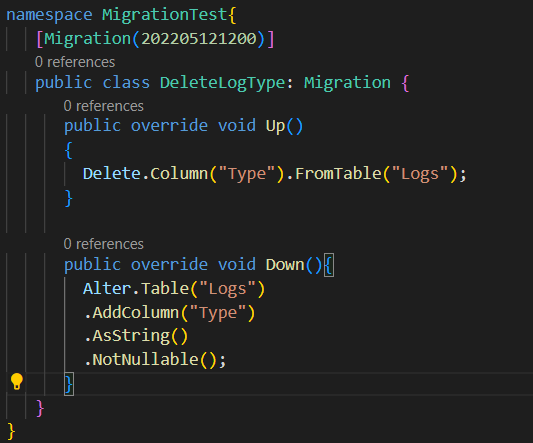
The fifth example show your how to delete a column in table.
The sixth example show you how to insert the data through fluent migrator. Seeding the data by migration is a very useful technique for creating the testing database.
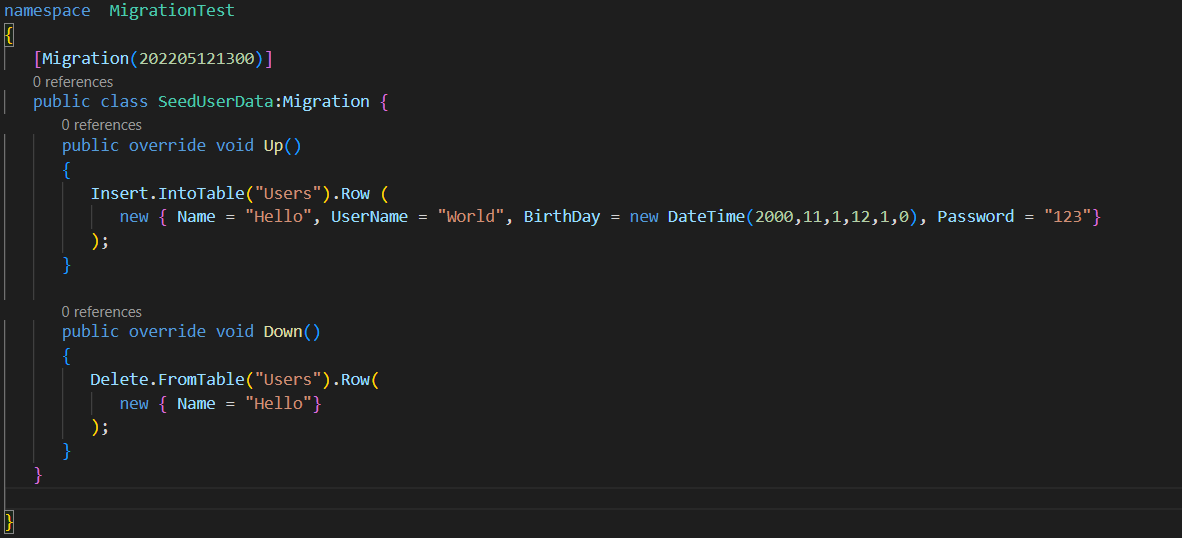
In this example , an anonymous object represent a record. The following picture show the anonymous object in table format.

As opposite the down method is to delete the inserted record. But you only need to assign the filter condition value to the anonymous object.
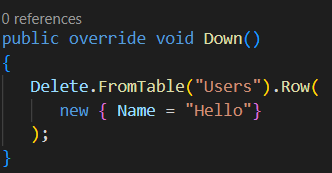
The seventh example shows you how to rename the existing column in the table.
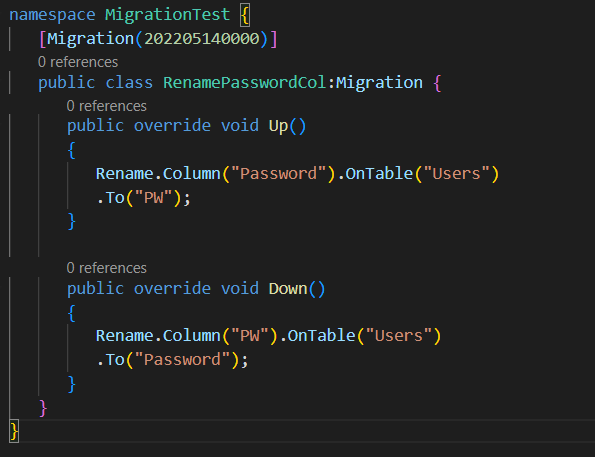
The eighth example shows you how to update the record value through Fluent Migrator. It is also useful function for creating the testing database.
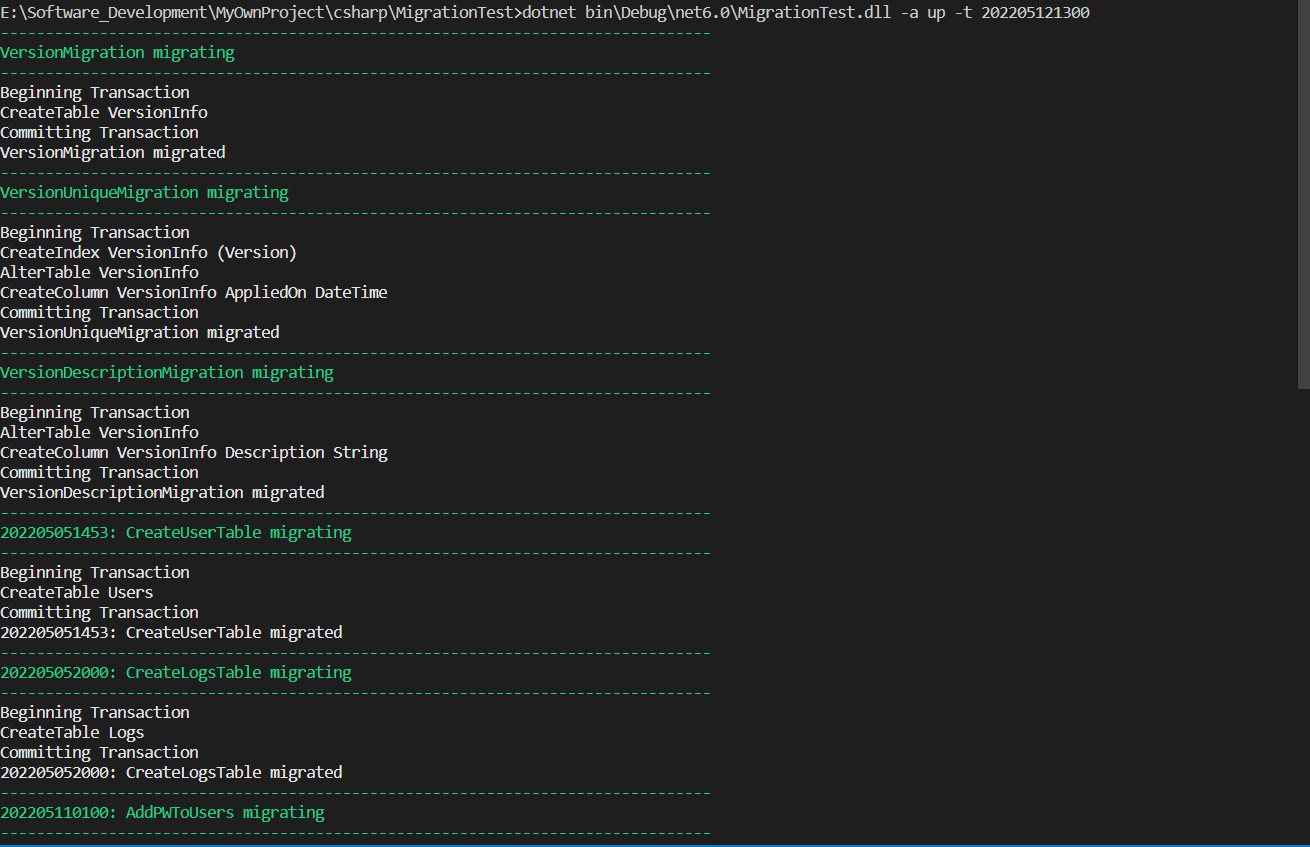
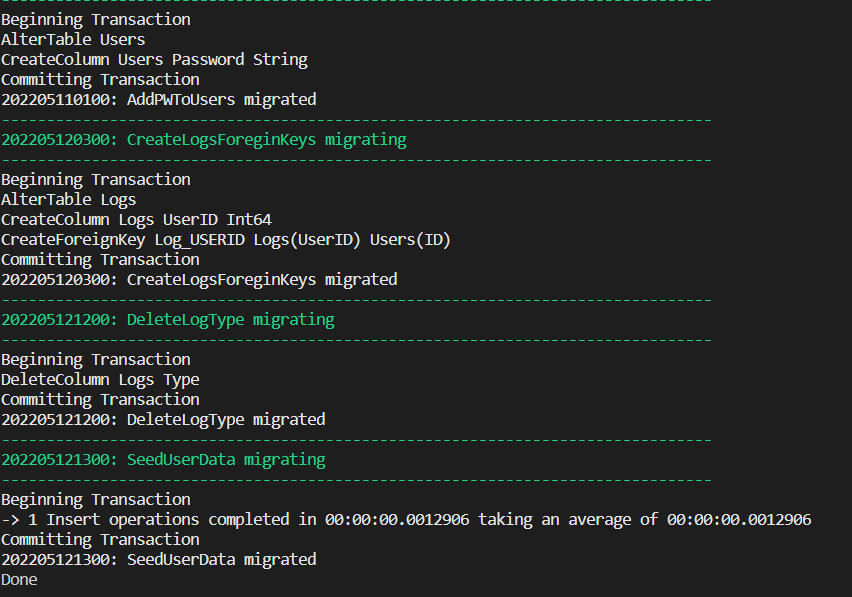
All the migration examples you have completed successfully. Now, you can input thhe "dotnet build ." command in terminal to build the source code to binary execution and do the migration task. For instance, input the following command in your terminal
.png)
Then you should see the migration task has done, and the Database schema is up to 202205121300 version.
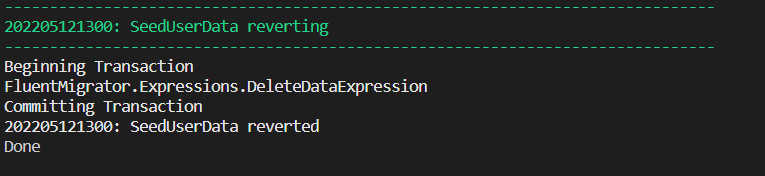
If you want to roll back the database version to 202205121200, then you can input the following command in your terminal.

Then the database is rollback to 202205121200 version successfully.
Wrap-up
In this article, I explain what is database migration and show you how to build up the database migration through Fluent Migrator. It is a light weight database migration library. If you are dapper ORM lover. I think you can use this library as a complementary to maintain the database schema. For the supporting database of fluent migrator and the API documentation. You can find them on its official website.
As always, thank you for your reading. For this tutorial source code. I uploaded to my GitHub.
Please leave your email below.